Configuring Atomic Swaps In Desktop Wallet
Currently, Atomic Swaps is Desktop Only. For more updates on upcoming Beam news, see our Telegram page.
https://www.youtube.com/watch?v=_SOgPybgi8Y&t=504s
Configuring Atomic Swaps
Configure your Beam wallet to enable Atomic Swaps by connecting to the node and wallet of the currency you wish to swap. Each currency can link with your Beam wallet via RPC full node or an Electrum wallet.
Connecting to Full Node via Litecoin
To connect Litecoin with your Beam wallet via full node, follow the steps below:
Edit Litecoin Configuration File
Using a text editor, open the Litecoin.conf file and enter the following parameters to configure Litecoin to run with JSON RPC:
# server=1 tells Litecoin-QT to accept JSON-RPC commands.
server=1

rpcport=9432

# You must set rpcuser and rpcpassword to secure the JSON-RPC api
rpcuser=liteuser
rpcpassword=123
Save your changes to Litecoin.conf.
Synch Litecoin Node with Beam Wallet
Go to Settings .
.
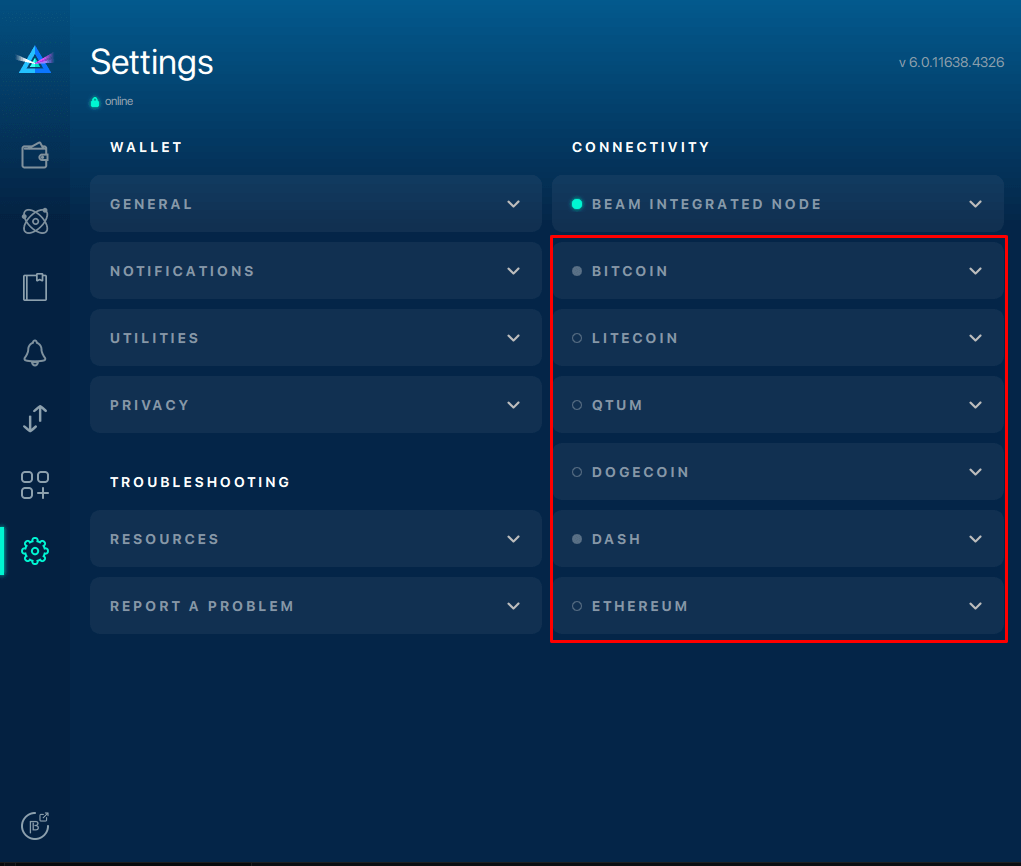
Enter Litecoin Node Address
Under the Litecoin tab, enter the node ip:port address along with the RPC username and password. The fee paid on the respective chain per Kb of transaction size can be left at the default value.
Click Apply > Connect.
A green light will appear next to Litecoin Node, indicating the connection was a success!

Connect with Electrum Wallet
If you have an Electrum wallet, connecting to a remote node follows a similar yet more straightforward process:
Edit Electrum Wallet Settings
- Settings
 > toggle "Node" to "Electrum."
 - Enter your Electrum address.
- Enter an existing seed phrase or generate a new one (you can change wallets at any time).
Once connected, you should be able to see the list of all wallet addresses in your Electrum wallet by clicking "Show wallet addresses."\
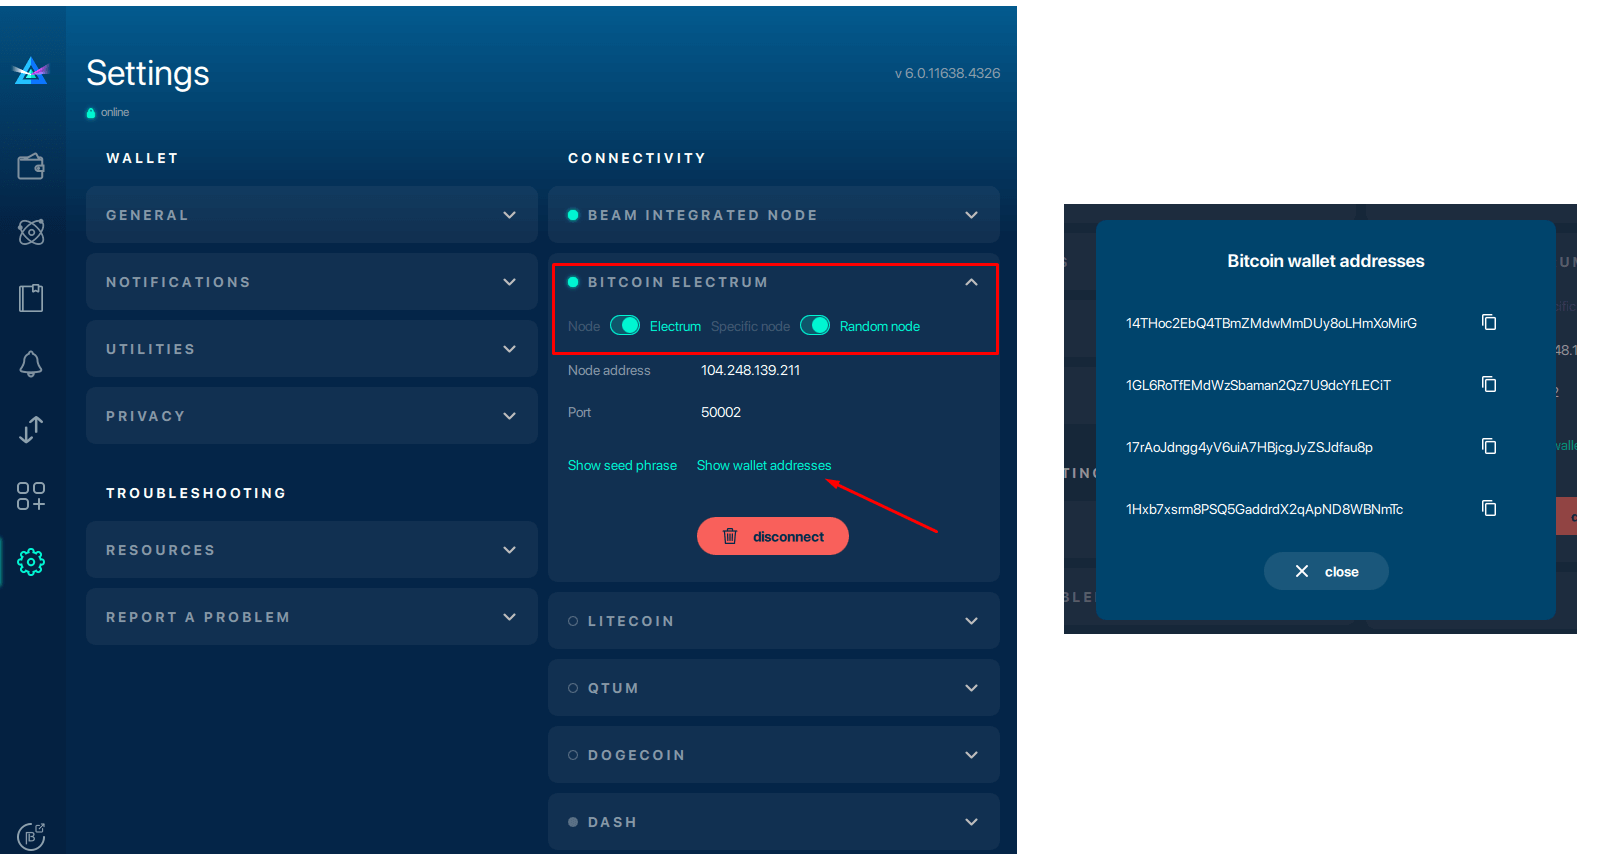
Once you have optimized and synchronized your nodes in the settings tabs, you will now be able to accept Atomic Swap offers.

Connecting to Ethereum
To link your Ethereum and Beam wallets together, you must have an Infura account as well as an Ethereum Metamask.
Infura is the API service that broadcasts information from the Ethereum blockchain, and Metamask is a browser-based Ethereum wallet.
Note: infura.io requires specific parameters from your Beam wallet as well as valid email address verification.
Before attempting to create an Ethereum <> Beam Atomic Swap make sure your wallet balance has enough Ethereum to cover mining fees.
To connect to Ethereum
- Launch infura.io.
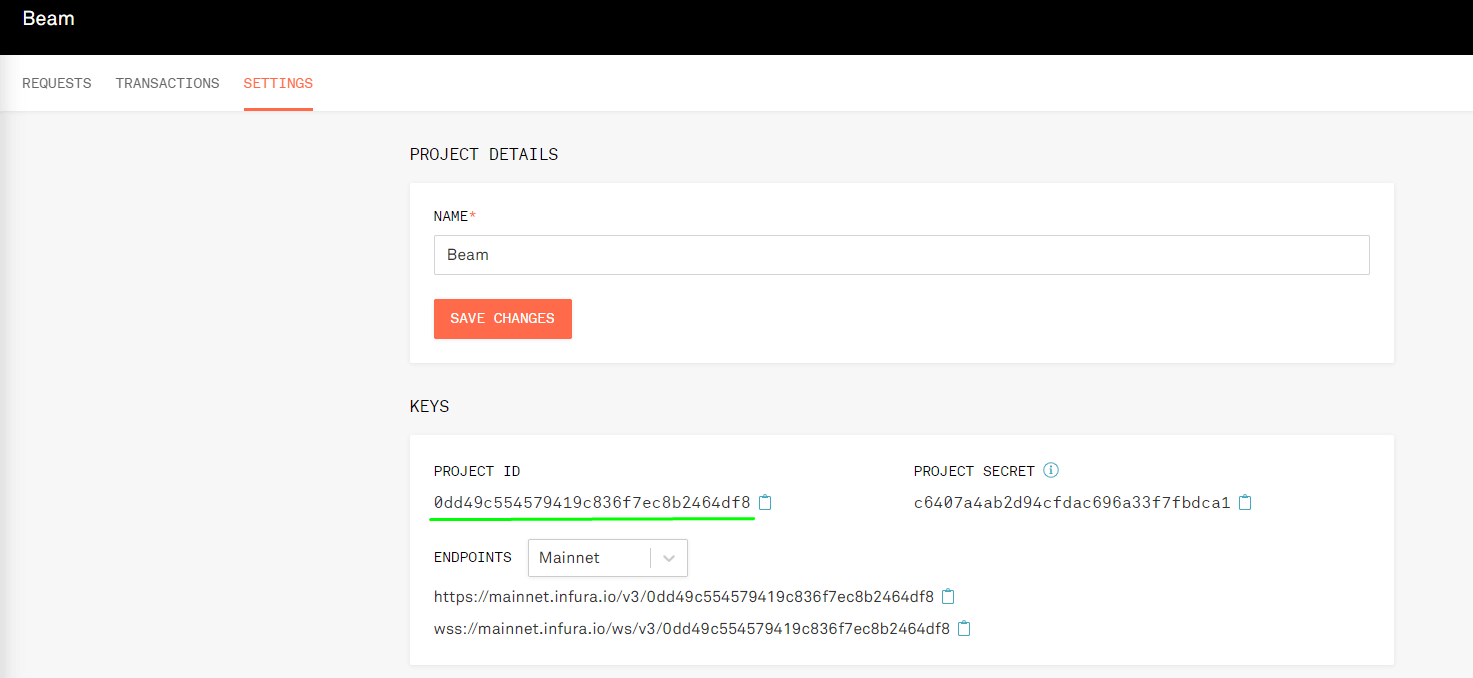
- Go to Settings > "keys" > Copy Project ID.
- Launch your Beam wallet.
- Go to Settings
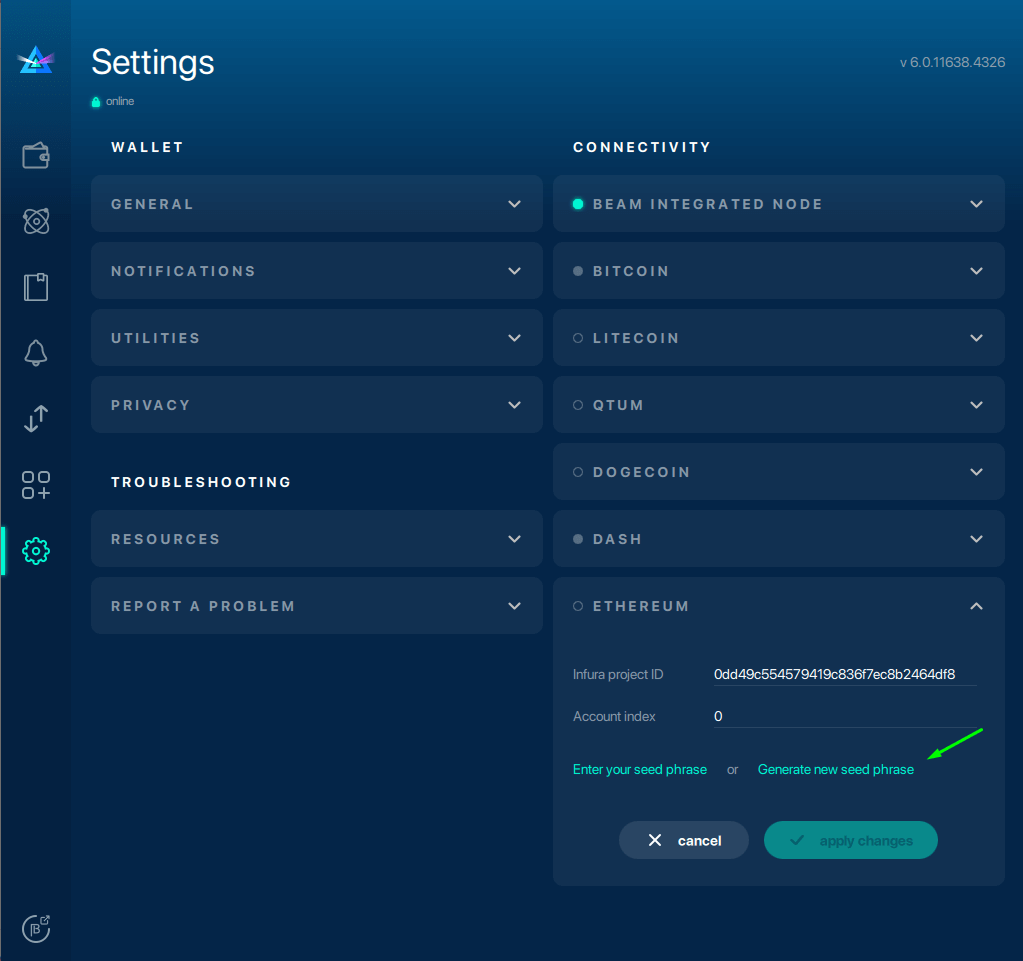
 > "Connectivity" > "Ethereum" > Paste Project ID.
 - Click "Generate Seed Phrase" to generate the seed phrase you will import to your Metamask. You can also use an existing seed phrase.
- Copy seed phrase > "apply changes" > "Connect to node."
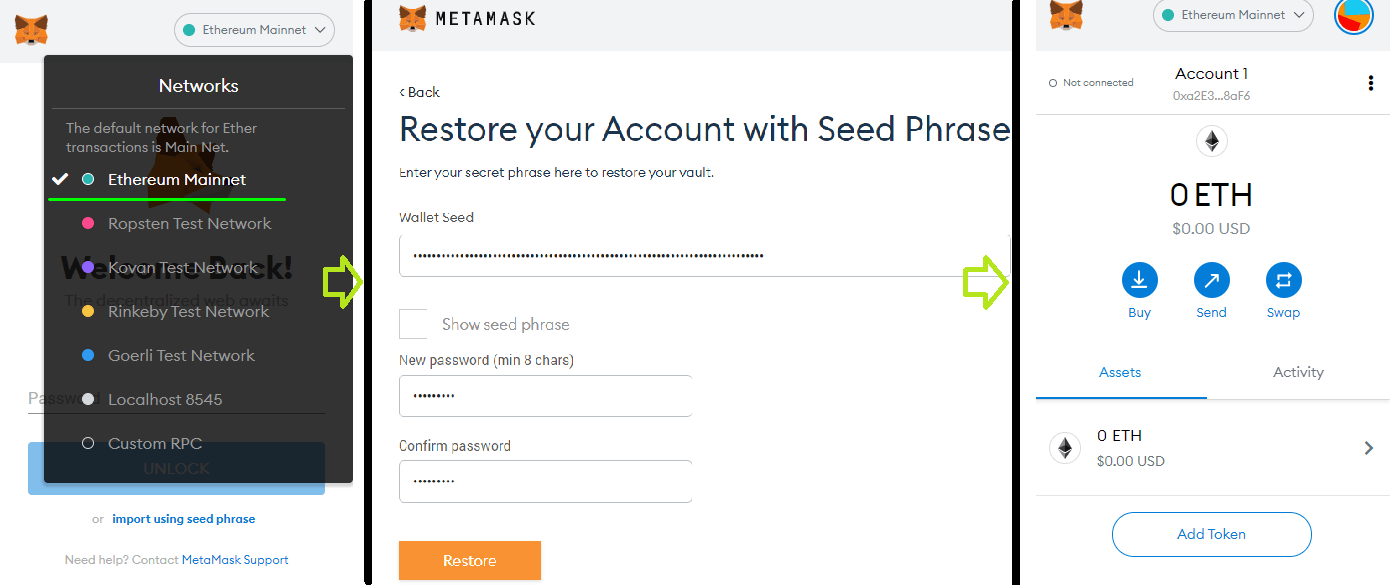
- Launch Metamask > click "import using account seed phrase."
- Enter your seed phrase and create a strong wallet password.
If you have successfully linked your accounts, a green light will appear next to the Ethereum node indicating the connection was a success!
How it looks in your wallet
Infura.io
Copy this project ID string.
Beam wallet settings
Paste your Infura Preject ID under "Ethereum."

Generate a new seed phrase
Click "apply changes" after you have copied your seed phrase.
Connect to Ethereum

Import Ethereum seed phrase
The next step is to import the Ethereum seed phrase into a Metamask wallet. At the bottom of your Metamask browser extension, click "Import using account seed phrase." Enter your seed phrase and create a password.
Atomic Swaps screen
